Choosing and Updating 12V Light Fixtures for Your RV or Boat
Published: 10/01/2025
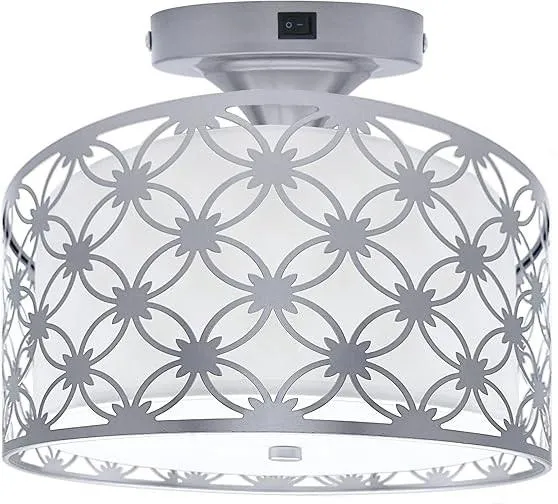
Beautiful 12V RV Pendant Light Fixture
Upgrading the interior lighting in your RV, camper, trailer, or boat is the single fastest and most impactful way to modernize and personalize your mobile space.
The great news for design enthusiasts is that you are no longer confined to ugly, factory-installed fixtures!
In fact, you can often use stylish residential light fixtures to achieve the popular modern farmhouse, bohemian, or industrial looks seen in home design or I have created a list of styllish 12 Volt fixtures. Sconces, pendants, reading lights and vanity lights are all here!
In this guide, we'll walk you through:
- The "Simple Secret" of when and how you can safely use stylish residential fixtures in a 12V system.
- The crucial difference between using a light controlled by a wall switch versus one controlled by a switch on the fixture itself.
- A quick DIY guide to safely changing out an old 12-volt light switch.
- A list of beautiful 12 Volt fixtures from Amazon.
- How to Paint Old RV and Boat Plastic Fixtures
We've gathered a wide variety of the most stylish 12 Volt light fixtures from Amazon in all the latest designs, sizes, and colors.
Here is your ultimate guide to choosing the perfect modern 12V fixtures for every area of your space! Find the perfect light to complement your space by shopping our selections here.
Shop 12 Volt Lights on AmazonWhen You Can Use Residential Fixtures
You can successfully use a stylish residential light fixture (designed for standard 120V household power) in your 12V RV or boat circuit—IF the fixture meets two primary, essential conditions.
1. Choose a "Dumb" Fixture (Simple Wiring)
The residential fixture must be a simple, traditional design that does not contain any complex integrated electronics, drivers, or transformers.
Look for a fixture that only includes:
- A metal or plastic shell (the body).
- A ceramic or plastic bulb socket (e.g., the standard E26/E27 screw-in base).
- Basic wiring connecting the socket directly to the main junction/power source.
If the fixture is a complex LED model or has specialty dimming components, it likely won't work. Stick to simple pendants, sconces, or flush mounts designed for traditional incandescent bulbs.
2. Use the Correct 12-Volt (12V) DC LED Bulb
This is the critical step! You must replace the standard 120V household bulb (which would instantly burn out and pose a serious fire hazard on a 12V system) with a specific type of bulb:
The Simple Swap:
- Choose a residential fixture with a standard, simple socket (like an E26 screw-in base).
- Replace the standard 120-volt (120V) household bulb with a compatible 12-volt (12V) DC LED bulb that has the matching base.
This smart, safe trick allows your stylish fixture to run efficiently on your camper's low-voltage DC battery system, finally delivering the popular, modern aesthetic you crave. Look specifically for "12V DC" or "RV/Marine" LED bulbs in the style you prefer (like Edison, globe, or standard A19 shapes).
Why a Dedicated 12V Option May Be Best
While you can use a residential light fixture with a compatible 12V DC bulb in your RV, a dedicated 12V RV fixture is often preferred for several practical reasons:
Durability: RV fixtures are designed to handle the vibration and movement of travel better than standard residential lights.
Size and Profile: They are usually lower-profile and more compact (like "pancake" lights) to maximize limited headroom and fit RV ceiling/wall depths.
Easy Installation: RV fixtures are typically designed as direct replacements, making wiring and mounting quicker.
Integrated Features: Many come with built-in switches, dimmers, or USB charging ports, simplifying your setup.
The most important thing is always to use a 12V DC bulb to match your RV's low-voltage electrical system, regardless of the fixture you choose.
Dimmers: 12V DC systems require specific PWM (Pulse-Width Modulation) dimmers, not the phase-cut (TRIAC) dimmers used in 120V residential wiring. If your fixture is on a dimmer, you must replace that dimmer switch with a 12V DC PWM-compatible dimmer switch if you want your new LED light to work properly. Many simple 12V LED replacement bulbs are not dimmable at all.
Light Bulb Color: (Color Correlated Temperature - CCT) Standardize on one CCT for the entire interior to create a cohesive, pleasant atmosphere. For a warm, inviting room, choose a "Soft/Warm White" 2700K to 3000K CCT to mimic traditional incandescent lighting. While maintaining that standard across the living area, you may consider a brighter "Daylight" or "Cool White" 4000K to 5000K CCT specifically for task-oriented areas like vanities, reading lamps, or the galley, as the whiter light improves focus and visibility.
When You Cannot Use a Residential Fixture
The one time you must avoid using a residential fixture in this manner is if it contains integrated electronics.
This is common with many modern, all-in-one LED fixtures.
Integrated LED Fixtures: If a fixture has a built-in LED array (a light panel or non-replaceable LEDs) that doesn't use a standard screw-in or pin-base bulb, it likely contains a driver (a small circuit board). This driver is specifically designed to convert the 120V AC household current to the low-voltage DC required by the LEDs.
The Problem: If you connect a fixture with a 120V AC driver to your 12V DC battery system, the driver will not work correctly, and the light will either not turn on, flicker, or be damaged.
In summary, as long as the residential fixture is simple and only serves as a decorative holder for a bulb with a standard base, the conversion is a popular and effective way to modernize your RV or boat.
When It is Unsafe to Use a Residential Fixture
While a residential fixture can often be used, it becomes a problem or is potentially unsafe in an RV or boat if:
1. The Fixture is Wired to the 120V AC Circuit (and a 12V Bulb is Inserted):
The Danger: If the residential fixture is connected to the RV's high-voltage 120V AC (shore power/generator) circuit and you accidentally screw in a 12V DC bulb (even if it fits the socket), the bulb will instantly receive approximately 10 times its intended voltage.
The Result: This will cause the 12V bulb to burn out immediately, often resulting in a flash, smoke, or even a small explosion/shattering of the bulb, posing a fire and injury risk. This is the main safety risk to avoid.
2. The Fixture is a Low-Quality Residential Fixture in a Marine/Wet Environment (Boat):
Residential fixtures are not designed for the harsh, corrosive environment of an RV or boat (especially saltwater).
The Problem: The materials, finishes, and internal components may quickly corrode or fail due to moisture and salt, leading to a loss of function or, in extreme cases, electrical shorts.
3. The Fixture's Internal Wiring is Not Rated for High Current (Less of a concern with modern LEDs, but important):
Low-voltage (12V) systems require much higher amperage (current) to deliver the same power as high-voltage (120V) systems.
The Problem: If you were to put a high-wattage 12V incandescent bulb (which draws many amps) into a residential fixture that has thin wiring only minimally rated for 120V current draw, the excess current could theoretically overheat the wire in the fixture.
Note: Since most people use very low-draw 12V LED bulbs in RVs/boats, this is rarely an issue, but it is a theoretical electrical limitation of using a low-voltage circuit.
4. The Residential Switch is Installed on a Polarity-Sensitive Circuit:
Most RV/marine light switches simply interrupt the positive (+) power wire, making the switch itself non-polarity sensitive.1
The Problem: However, if you use a residential light switch that contains an indicator light (a small light that glows when the switch is off), that indicator light is often a polarity-sensitive LED. If the switch is wired backward (negative to the side meant for positive), the indicator light may not work at all, even though the main light fixture will still switch on and off correctly. This is a functionality issue, not a safety risk, but it means the new switch isn't working as designed.
5. The 12V LED Bulb is Polarity-Sensitive (Less Common, but possible):
If you install a residential fixture and wire it to a DC power source (which has a positive and negative pole), an older or cheaper 12V LED bulb that lacks an internal bridge rectifier may be polarity-sensitive.
The Problem: If the wiring is reversed (positive to negative and vice versa), the bulb simply will not light up but should not be damaged. Most modern 12V LED bulbs for RV/marine use include internal protection to work regardless of which wire is connected to positive/negative.
The essential rule for safety is: Always verify the fixture is wired to 12V DC before inserting a 12V bulb, and be mindful of the corrosive environment for boats.
Wall Switch vs. Fixture Switch: The 12V Swap Rule
The rule for replacing 12-volt (V) lighting in an RV or vehicle depends entirely on where the power is controlled:
1. If the light is controlled by a separate wall switch:
- You do not need to worry about the fixture type; almost any fixture will work.
- The circuit is turned on and off by the wall switch.
- You can use any 12V fixture that is designed to be "always on" when power is supplied.
- You can even use a standard residential (120V) fixture design, provided you install a 12V DC bulb (like a 12V LED with an E26 base).
- Caution: Avoid a new fixture that also has its own switch, as you would have to flip both the wall switch and the fixture switch to get light.
2. If the light is controlled by a switch on the fixture itself:
- You must replace it with a new 12V fixture that also has a built-in ON/OFF switch.
- The wires running to that fixture location are always live (hot) with 12V power.
- If you install a fixture without a switch, the light will be on all the time (and drain your battery).
- The alternative is to install a new wall switch (wired or wireless), which is more complex than a simple fixture swap.
Ready to Shop? Find Your 12V Lighting Fixtures on Amazon
Amazon has a variety of 12-volt light fixtures and 12V LED replacement bulbs in all styles, sizes, and colors. Find the perfect fixture that complements your interior design by shopping for 12V lighting options directly here!
Shop 12v Light Fixtures on Amazon HereHow to Change Out 12-Volt Switches on Your Boat or RV
Is that old light switch on your boat or RV getting a little sticky? Or perhaps you're finally upgrading to a cool illuminated rocker switch? Good news! Replacing a standard 12-volt light switch is one of the easiest DIY electrical fixes you can tackle.
Why the Switch (Pun Intended)?
In RVs and boats, most lighting and small appliances run on 12-volt DC (Direct Current) power, typically supplied by your house battery bank. Unlike home wiring, this system is simpler, but switches can wear out over time from moisture, heavy use, or simply being decades old.
What You'll Need:
- New 12V switch (toggle, rocker, or push-button)
- Screwdriver (Phillips or flathead, depending on your switch/panel)
- Wire strippers/crimpers
- Replacement terminals (usually spade connectors)
- Most Important: A Multimeter or 12V Test Light
Safety First: Power Down!
- Before touching any wires, you must cut the power.
- Locate the Fuse: Find the fuse or breaker for the specific light circuit you are working on.
- Pull the Fuse/Flip the Breaker: Remove the fuse or switch off the breaker.
- Verify: Use your test light or multimeter to confirm there is NO power at the switch terminals.
The Simple Swap (On/Off Switch)
Most simple switches have two terminals: one for the incoming power (from the fuse box) and one for the outgoing wire (to the light).
- Remove the Old Switch: Unscrew the faceplate (if there is one) and gently pry the old switch out of the panel.
- Note the Wiring: Crucially, note which wire connects to which terminal. Take a photo! If the wires aren't color-coded (red for positive, black for negative), make sure you know which one is the incoming power.
- Disconnect: Carefully remove the wires from the old switch. You may need to snip the old connectors off.
- Connect the New Switch: Strip a small amount of insulation from the wire ends and crimp on new spade connectors. Connect the wires to the corresponding terminals on the new switch.
- Pro Tip: For illuminated (LED) switches, you may have an extra ground (negative) wire. Follow the diagram provided with your new switch!
- Install: Push the new switch securely into the panel cutout and replace the faceplate.
- Test: Restore power at the fuse or breaker and test your new switch. Enjoy the light!
A non-working switch doesn't have to be a major electrical headache. With a little care and a few minutes of your time, you'll be switching back to full power!
How to Replace RV Recessed Lights
When replacing your RV's recessed lights, matching the cutout hole size is the most critical step to ensure a clean, "flush" look without having to cut new holes in your ceiling.
Measuring for the Right Fit
To find your replacement, don't measure the outer trim of the existing light. Instead:
• Remove one light: Pull the fixture down (carefully!) to expose the hole.
• Measure the cutout: Measure the diameter of the actual hole in the ceiling.
• Standard RV Sizes: Most RV recessed lights require a cutout between 2.15" and 4.25". Common "3-inch" lights often need a 2.25" to 2.5" hole, while larger "4-inch" models may need a 3.5" to 4.1" hole.
Replacing RV recessed lights is usually a quick DIY project because most modern units use "mousetrap" spring clips.
1. Safety First
• Turn off the power: Switch off the light wall switch and, for extra safety, pull the 12V fuse for 그 circuit in your breaker panel.
2. Remove the Old Light
• Pull down gently: Grasp the edges of the light fixture and pull it away from the ceiling.
• Watch your fingers: These lights are held in by strong spring-loaded metal arms (like a mousetrap). Hold them back as you pull the light out so they don't snap on your fingers.
3. Disconnect the Wires
• Expose the wiring: Pull the light down far enough to see the wire connectors (usually wire nuts or crimp connectors).
• Cut or unscrew: Disconnect the two wires (typically a black/red power wire and a white ground wire).
4. Wire the New Light
• Strip the wires: If the new light has bare ends, strip about 1/2 inch of insulation.
• Connect: Match the wires (usually positive to positive, negative to negative) using new wire nuts or crimp connectors.
Note: Since RVs use DC power, if the LED doesn't turn on during a quick test, try swapping the wires—polarity matters with LEDs.
5. Reinstall
• Fold the springs: Push the spring arms upward against the body of the light.
• Insert: Push the fixture back into the hole. The springs will snap open inside the ceiling, pulling the light flush.
How to Paint Old RV and Boat Plastic Fixtures
Nothing dates an RV or a boat faster than yellowed, chalky plastic fixtures. Whether it’s a vent cover, a light housing, or a cup holder, that "aged" look can make even a clean rig feel tired.
Refurbishing these parts is one of the most cost-effective ways to shave a decade off your vehicle's appearance. However, because we deal with high-vibration environments and constant UV exposure, you can't just spray and go. The secret to a professional, flake-free finish isn't just the paint—it’s the surface prep.
Step 1: Removal & Surface Preparation
Before you reach for a can of paint, you have to get the parts off and get them clean.
Extraction: Most plastic fixtures are held by hidden clips or screws covered by "plugs." Use a plastic trim tool (avoid metal screwdrivers!) to pry covers off without scarring your surrounding vinyl or fiberglass.
Deep Clean: RV and boat plastics absorb years of oils, grime, and even nicotine. Scrub everything with TSP (Trisodium Phosphate) or a heavy-duty degreaser. If any oily film remains, your paint will peel within a month.
The "Scuff": Use 400-grit sandpaper or a grey Scotch-Brite pad https://amzn.to/4ubqgJW. You aren’t trying to remove material; you are creating "tooth" for the paint to grab. The plastic should look dull and matte, not deeply scratched.
Step 2: The Essential Supply List
For mobile environments, standard hardware store spray paint won't cut it. You need products designed for flexibility.
Adhesion Promoter: Dupli-Color Adhesion Promotor EXP199. https://amzn.to/4rYneHO Think of this as "glue" for paint. It is the essential chemical bridge that helps the finish stick to smooth, non-porous plastics.
Vinyl & Plastic Paint: Look for brands like Dupli-Color https://amzn.to/47c9FMg These aren't standard paints; they bond at a molecular level and are designed to expand and contract with temperature swings.
Tack Cloth: https://amzn.to/4b713Yz Plastic builds up static when sanded, which attracts dust. A tack cloth is the only way to remove every microscopic speck before you spray.
Step 3: The Painting Process
Dry Thoroughly: Plastic can be surprisingly porous. Let your parts air-dry completely after cleaning so trapped moisture doesn't ruin the finish.
Apply Adhesion Promoter: Spray one clear, light coat. This will leave the surface slightly "tacky" and ready for color.
Mist, Don't Soak: Apply 3–4 light mists rather than one heavy coat. If you see "runs," you’re moving too slowly or holding the can too close.
The Wait (The Hardest Part): Even if it feels dry in an hour, wait 24–48 hours before reinstalling. The paint needs to "outgas" and fully harden to handle the vibrations of travel or waves.
Pro-Tips for the Road
The "Sun" Test: For exterior vents, ensure your paint is rated for high heat or exterior UV. Otherwise, the sun will turn the paint brittle, leading to cracks.
Avoid Clear Coats: Unless you are using a professional 2-part (2K) clear with a hardener, skip the clear coat entirely. Most consumer-grade clears yellow faster than the original plastic did!
Join Us!
About the Author: Maria Faires, RD
Maria Faires is a Licensed Boat Captain, Registered Dietitian, and Fitness Expert who spent years mastering the art of living well in small, mobile spaces. Whether she is navigating a vessel at sea, trekking through the African savanna, or optimizing her own RV for a cross-country haul, Maria believes that your environment is the foundation of your well-being.
Through Where Is Maria Adventure Travel, she provides strategic guides to help travelers stay fit, eat well, and explore beautifully. From upgrading RV lighting for better "galley gourmet" visibility to provisioning for months at sea, Maria’s mission is to help you navigate the wild with confidence and style.
Ready to light up your next adventure? Find Maria's top-rated RV upgrades and adventure-ready gear on her here.
Check out Maria’s curated on her Linktree, and follow her journey on Facebook and Instagram for real-time tips from the helm, the trail, and the road.
Blog: https://www.myactivenutrition.com/category/where-is-maria-boating-&-adventure-travel
YouTube: https://www.youtube.com/@HealthyBoatLiving
Facebook: https://www.facebook.com/WhereIsMariaAdventureTravel/
Instagram: https://www.instagram.com/whereismariaadventuretravel
⚓️ As an Amazon Associate, I earn from qualifying purchases.