How to Stop RV Condensation: Year-Round Humidity Control Tips for RV Owners
Published: 10/31/2025
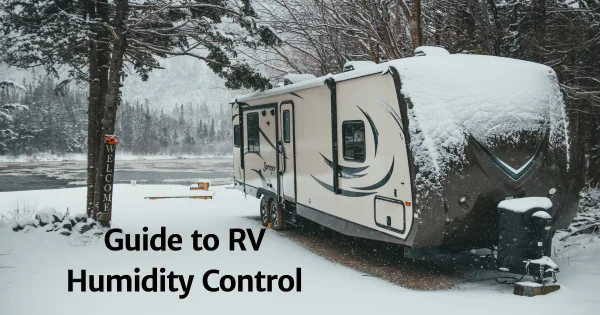
The Ultimate Guide to RV Humidity Control: Protecting Your Investment
RV humidity control is arguably the most critical and least understood aspect of maintaining your home on wheels. Unchecked moisture is the primary culprit behind costly problems like persistent RV condensation, the rapid growth of toxic mold and mildew, and even serious, long-term structural damage—all of which directly threaten the value of your mobile investment.
The good news is that veteran RVers agree: successfully managing moisture requires a simple, adaptable, multi-pronged approach that changes with the season. This comprehensive guide covers the essential year-round core strategies, including accurate humidity monitoring and proactive airflow management, and provides specialized, seasonal tactics—detailing the best monitors, dehumidifiers, cooking options and RV and Van heating solutions for optimal control in both hot/humid summers and cold, condensing winters.
Dive in to learn the best monitoring tools, ventilation techniques, and seasonal dehumidifying strategies used by full-time RVers and van life experts to keep their rigs dry, healthy, and protected all year long.
The Year-Round Core Strategy: Monitoring, Ventilation, and Prevention
Regardless of the weather outside, your first steps should always be to monitor and manage the sources of moisture.
1. Monitor Relative Humidity (RH)
• The Essential Tool: Every RVer needs a hygrometer Wi-Fi or Remote Sensor for Monitoring. You need to keep the Relative Humidity (RH) between 40% and 60% (many full-timers aim for the tighter range of 30-50% in cooler weather). If the RH is too high, it's time to act.
Recommended Monitoring Tools:
Digital Hygrometer/Thermometer
Cellular Temp and Humidity Monitor
2. Maximize Airflow and Ventilation
• Exhaust Fans are Key: Always run your bathroom vent fan while showering and your range hood fan while cooking. This is the fastest way to expel humid air immediately.
• Cross-Breeze Power: Crack a window and a roof vent (or two windows on opposite ends) to create a cross-breeze. This is the single most effective, low-power method.
• Open Cabinets: Keep closet and cabinet doors slightly ajar to allow airflow into stagnant, dark spaces where mold thrives.
• Invest in a Fan: Use a small circulating fan to keep air moving around the main living area, especially near cold walls or windows where condensation is likely.
3. Minimize Moisture-Adding Activities
• Cook Outdoors: Whenever possible, cook outside, use a grill or a portable induction cooktop. Indoor cooking and boiling adds a massive amount of moisture.
• Dry Laundry Off-Site: Avoid drying wet clothes and towels inside. Use a commercial laundromat dryer or hang them outside. Use rapid drying towels like these waffle weave.
• Wipe Down Surfaces: After showering or cooking, quickly wipe down bathroom and kitchen surfaces where condensation has occurred.
Strategy for Summer & Humid Climates
In warm, humid areas, the air outside is the main source of the moisture trying to get in. Your goal is to cool and dry this air.
• Air Conditioner (A/C) is Primary: The A/C unit is your primary dehumidifier in summer. As it cools the air, it pulls moisture out, dripping it outside. Running the A/C is the easiest way to drop humidity quickly.
• Dedicated Compressor Dehumidifier: If it's warm and humid, but you don't need the A/C running constantly, a dedicated compressor-style electric dehumidifier is the way to go. These are the most power-efficient dehumidifiers in warm temperatures to maintain your ideal RH level.
Compressor Dehumidifier for a large RV
Compressor Dehumidifier for Small Space
Passive Absorbers: For very small, enclosed areas like closets, storage bays, or under the sink, passive chemical absorbers (like DampRid) are effective. They use calcium chloride crystals to wick moisture from the air, but they are generally too small to treat the main living area.
Hanging DampRid/Moisture Absorbing
Renewable Moisture Absorber EvaDry
Strategy for Winter & Cold Climates
In cold weather, the main source of moisture is human activity (breathing, cooking, showering), which condenses instantly on cold surfaces like windows and walls.
Dehumidifier: RV owners prefer a desiccant-style electric dehumidifier in the winter because they work significantly better in colder temperatures 65F than standard compressor-style units, which can freeze up and become inefficient. This Ivation compact unit is rated for up to 270 sq ft, covering most RV sizes and is an excellent choice for RVs, especially if you camp in cool or cold weather where condensation is a major problem. It naturally exhausts slightly warm air, which is a bonus in a cold RV for added comfort and preventing window condensation. It includes a continuous drain hose, so you won't have to constantly empty the small water tank. I's known for relatively quiet operation in a small living space.
Ventilation with Heat: This is a crucial tactic. RVers often run a small electric ceramic space heater (which produces dry heat) simultaneously with cracking a window/vent and running an exhaust fan. This introduces dry air while expelling the warm, humid air, preventing condensation.
Avoid Propane Heat (If Possible): Propane furnaces and stovetops produce water vapor as a byproduct of combustion, drastically increasing indoor humidity. Many full-timers switch to electric heat (when connected to shore power) to avoid this.
An Oil-Filled Radiator Heater is your best supplemental heat choice because it provides consistent, dry, radiant heat that prevents condensation, all while running safely on your RV's limited electrical system. This Air Choice 700W is recommended because it has a fixed, low power draw.
Use an Electric Infrared Wall Heater. The Heat Storm This electric infrared heater is a game-changer for an RV. It’s the perfect furnace supplement and a lifesaver for saving propane. Iit’s compact and can be wall-mounted to save precious floor space. Plus, since it doesn't add moisture like propane heaters, it helps prevent condensation. Use the 500W setting to run comfortably all night without blowing a breaker.
Insulation: Use Reflectix or window insulation film on single-pane windows to raise the surface temperature of the glass, which stops moisture from condensing directly on the cold pane.
Use an induction cooktop. These utilize electromagnetic energy to heat cookware directly without burning any fuel, which means the cooking process itself adds zero water vapor to the RV's air. This is a critical advantage over traditional propane stoves, where combustion chemically releases water and carbon dioxide into the enclosed living space. By eliminating this internal source of humidity during meal preparation, induction significantly reduces the risk of condensation, mold, and mildew buildup inside the small cabin environment.
The NuWave PIC Flex is an excellent induction cooktop choice for RVs and boats, primarily because it's designed with adjustable wattage (usually 600W, 900W, 1300W, and 1500W). This flexibility is crucial for cooking when you are running off a limited power source like a small inverter or a campground's lower-amperage hookup, helping you prevent electrical overloads. The compact size and included pan also make it a convenient, ready-to-use solution for small kitchens and galleys.
The Duxtop Portable Induction Cooktop 9600LS is highly recommended for RV and boat use, as it balances great performance with low-power flexibility. Its numerous precision settings allow for efficient, reliable cooking while carefully managing the electrical draw on limited mobile circuits.
For more information about keeping your RV mold and mildew free, see this blog:
For more information about keeping your RV mold and mildew free, see this blogStrategies for Winter & Cold Climates
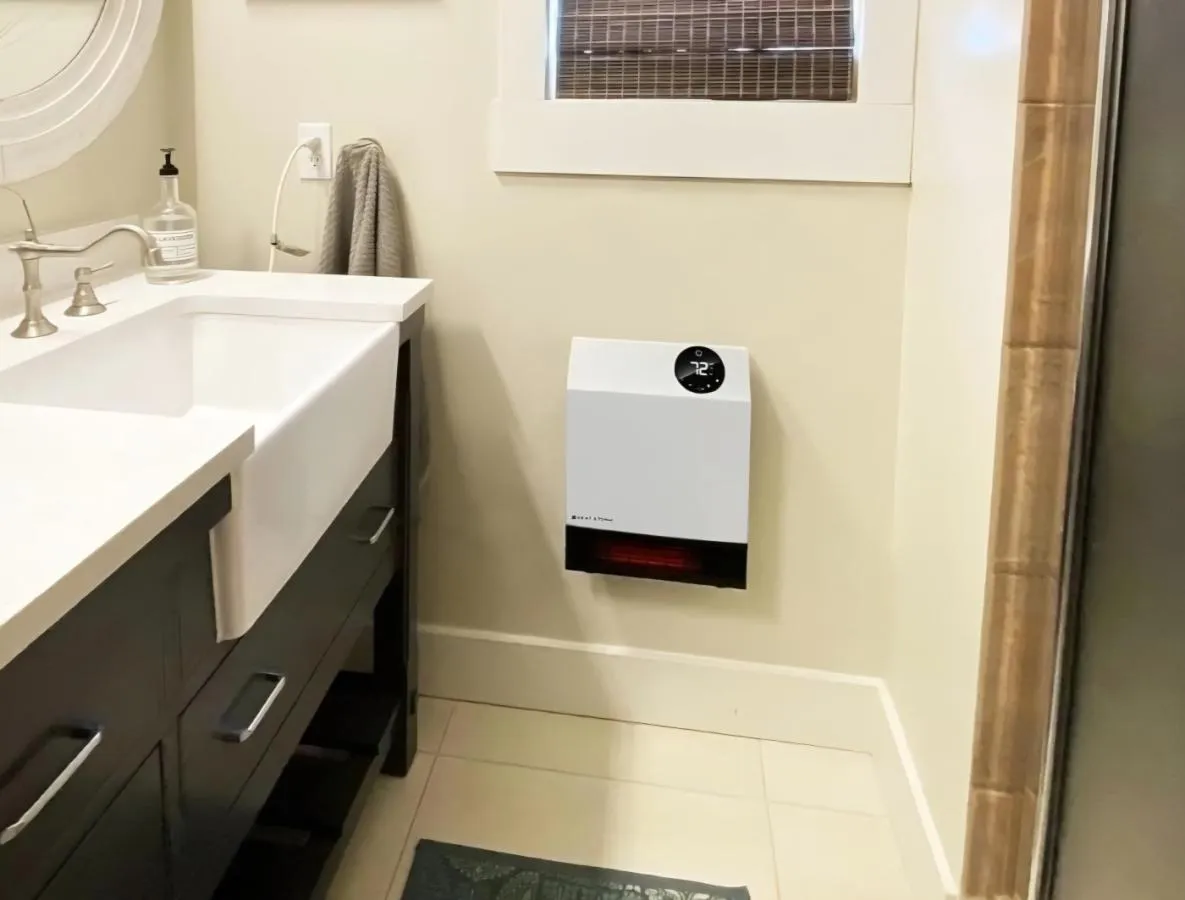
The Heat Storm Electric Infrared Wall Mounted 500W to Supplement Your Propane Heater
In cold weather, the main source of moisture is human activity (breathing, cooking, showering), which condenses instantly on cold surfaces like windows and walls. Managing this condensation requires a multi-faceted approach, and we’ve broken down the best tools and tactics—from specialized dehumidifiers to smart heating choices—to keep your RV dry and mold-free.
Dehumidifier: RV owners prefer a desiccant-style electric dehumidifier in the winter because they work significantly better in colder temperatures 65F than standard compressor-style units, which can freeze up and become inefficient. This Ivation compact unit is rated for up to 270 sq ft, covering most RV sizes and is an excellent choice for RVs, especially if you camp in cool or cold weather where condensation is a major problem. It naturally exhausts slightly warm air, which is a bonus in a cold RV for added comfort and preventing window condensation. It includes a continuous drain hose, so you won't have to constantly empty the small water tank. I's known for relatively quiet operation in a small living space.
Ventilation with Heat: This is a crucial tactic. RVers often run a small electric ceramic space heater (which produces dry heat) simultaneously with cracking a window/vent and running an exhaust fan. This introduces dry air while expelling the warm, humid air, preventing condensation.
Avoid Propane Heat (If Possible): Propane furnaces and stovetops produce water vapor as a byproduct of combustion, drastically increasing indoor humidity. Many full-timers switch to electric heat (when connected to shore power) to avoid this.
An Oil-Filled Radiator Heater is your best supplemental heat choice because it provides consistent, dry, radiant heat that prevents condensation, all while running safely on your RV's limited electrical system. This 700W is recommended because it has a fixed, low power draw.
Use an Electric Infrared Wall Heater. The Heat Storm This electric infrared heater is a game-changer for an RV. It’s the perfect furnace supplement and a lifesaver for saving propane. Iit’s compact and can be wall-mounted to save precious floor space. Plus, since it doesn't add moisture like propane heaters, it helps prevent condensation. Use the 500W setting to run comfortably all night without blowing a breaker.
Insulation: Use Reflectix or window insulation film on single-pane windows to raise the surface temperature of the glass, which stops moisture from condensing directly on the cold pane.
Mattress Underlay
The best solution for preventing mold and mildew under an RV mattress is a breathable, anti-condensation mattress underlayment. Condensation occurs when the warm air from inside the RV (and your body) meets the cold surface of the bed platform, creating moisture that gets trapped underneath the mattress.
These products work by creating a small gap to allow air to circulate freely, eliminating the moisture before it can cause mold or mildew.
Use an induction cooktop. These utilize electromagnetic energy to heat cookware directly without burning any fuel, which means the cooking process itself adds zero water vapor to the RV's air. This is a critical advantage over traditional propane stoves, where combustion chemically releases water and carbon dioxide into the enclosed living space. By eliminating this internal source of humidity during meal preparation, induction significantly reduces the risk of condensation, mold, and mildew buildup inside the small cabin environment.
The NuWave PIC Flex is an excellent induction cooktop choice for RVs and boats, primarily because it's designed with adjustable wattage (usually 600W, 900W, 1300W, and 1500W). This flexibility is crucial for cooking when you are running off a limited power source like a small inverter or a campground's lower-amperage hookup, helping you prevent electrical overloads. The compact size and included pan also make it a convenient, ready-to-use solution for small kitchens and galleys.
The Duxtop Portable Induction Cooktop 9600LS is highly recommended for RV and boat use, as it balances great performance with low-power flexibility. Its numerous precision settings allow for efficient, reliable cooking while carefully managing the electrical draw on limited mobile circuits.
For more information about keeping your RV mold and mildew free, see this blog:
The Ultimate Guide to a Dry & Healthy RV: Stop Moisture, Mold & MildewVan or Camper Life Practices to Heat Your Space and Minimize Moisture
One of the biggest challenges of living or camping in a van or SUV, especially in cold weather, isn't just staying warm—it's doing so safely, efficiently, and without building up excessive moisture.
In this guide, we break down the pros and cons of the most popular heating options and, importantly, include tips on how to significantly decrease moisture (condensation) in your small space.
READ: Stay Warm and Dry: Your Guide to Effective Van and SUV HeatingJoin Our Journey

Expert guidance to help you stay fit and explore beautifully on the water. As a licensed OUPV Boat Captain, Registered Dietitian, and Medical Exercise Specialist, I combine maritime expertise with science-backed wellness to master the strategy of boat life.
When I’m not at the helm, you’ll find me advocating for marine wildlife conservation or exploring the world’s most stunning coastlines.
Categories: RV and Camping Where Is Maria Boating and Adventure Travel
Tags: #rv, camping, van life